zondag 14 april 2013
Ladies Circle Cherry Crumble
Shopping List:
350 gr fresh or frozen cherries (defrosted and dried)
140 gr self-raising flour
1/2 teaspoon ground cinnamon
50 gr caster sugar
1 egg, free range
4 tablespoons milk ( not skinny)
85 gr melted butter
Icing sugar, or fine powdered sugar for dusting
For the topping:
25 gr plain flour
1/4 teaspoon ground cinnamon
25 gr caster sugar
25 gr butter, sliced @ room temperature
Remove the stalks and stones from the cherries. Defrost the frozen cherries and dry them properly on paper/kitchen towel.
Preheat your oven to 180C. Grease or spray and line a round 20 cm tin. Sift the flour, cinnamon and caster sugar into a bowl. Make a well in the middle of the mixture and add the egg, milk and melted butter. Mix it all together thoroughly either with a wooden spoon or your electric mixer until it is smooth and not runny. Pour it into your prepared tin and even it out slightly.
Scatter the cherries over this mixture and gently press them in a little.
Topping wise: Put all the ingredients into a bowl and rub the butter with your fingers until you get a crumble mixture. Scatter this topping over the cherries.
Bake in your preheated oven for 30-35 minutes or until your skewer comes out clean. Leave it in the tin to cool for 5-10 minuutes or until cool enough to handle. Remove the cake from the tin and transfer it gently up side down onto your wire rack to remove the paper, until it has cooled completely. But not if you want to serve it warm. Then turn it onto a serving plate.
Dust with icing sugar for a nice presentation and serve warm or cold with whipped, clotted or icecream.
An excellent finish to a lovely dinner party served with a glass of red wine. Or an afternoon treat for a ladies circle meeting. Or make it a day before a picnic.
"Enjoy"
Kim's Triple Chocolate Biscuits
Shopping List:
100 gr soft brown sugar
100 gr caster sugar
100 gr butter, softened
1 egg, free range
1 teaspoon vanilla extract
225 plain flour
140 gr milk chocolate, melted
85 gr white chocolate, chunkly chopped
85 gr plain chocolate, chunkly chopped
Preheat your oven to 200C. Line 1 to 2 baking trays with paper. Mix the sugars and the butter together and then add the egg, vanilla, flour and half of the melted milk chocolate and mix together.
Stir in the white and the plain chocolate chunks ( or if you have found them, chips). Then you use an ice cream scooper or rounded soup spoon to scoop the balls onto the tray.
Bake the biscuits in batches for 8-9 minutes until they are pale, soft to the touch and a little light brown around the edges.
They will harden up as they cool. Carefully put them on your wire rack and drizzle them with the remaining melted chocolate.
The dough and the biscuits can be frozen.
"Enjoy"
zaterdag 13 april 2013
Cantucinni & Sultana Cheesecake
This cake can be made 2 days ahead !
Shopping List:
100 gr sultanas
3 tablespoons Disaronno liqueur (optional)
50 gr butter, softened
6 digestive biscuits, crushed
8 cantucinni biscuits, crushed
600 gr full fat cream cheese ( Mascarpone or Philadelphia)
3 eggs, free range
170 gr sour cream
3 tablespoons (about 36 gr) flour
1 teaspoon vanilla extract
175 gr soft light brown sugar
Icing sugar to serve
Roughly broken cantucinni biscuits to serve
Put the sultanas in a bowl or a cup and let them soak in Disaronno for about 1 hour. ( Or use a little almondextract : 1/2 teaspoon with 3 tablespoons of water, instead)
Preheat your oven to 180C. and lightly grease or spray your 23 cm loose-bottomed round cake tin or springform. Melt the butter in a pan over a gentle heat and stir in both the biscuits crumbs.
Mix it well and then tip it into the base of your tin and push down with the back of a tablespoon to create a nice layer. Bake this in your preheated oven for about 5 minutes and allow to cool.
In the mean time, beat the cheese and the eggs, soured cream, flour, vanilla extract and the caster sugar thoroughly together. Until nice and smooth. Stir in the sultanas with the Disaronno. If you have used water, drain them first. Pour the mixture into your prepared base and bake in your preheated oven for about 30 minutes until set. It may have a little bit of a dooble in the middle of the cake. Let it cool in the tin.
Serving: Dust with icing sugar and top with some broken cantucinni biscuits and with a glass of chilled Disaronno or a Dry sherry.
An excellent finish to a nice dinner party Italian Style.
"Enjoy"
April's Apple, Pear and Walnut crumble
April's Apple, Pear and Walnut Crumble
Shopping List:
500 gr. cooking apples, all peeled and roughly cut
grated zest of 1 lemon and 1/2 juice of that lemon
2 tablespoons light soft brown sugar
500 gr pears, peeled and roughly cut
For the crumble topping:
100 gr walnuts
175 gr of flour (any)
85 gr butter
85 gr caster or soft white sugar
Preheat your oven to 190C. Put the apples, lemon zest and the sugar in your saucepan. Add the lemon juice and cook for 3-4 minutes. Add the pears and cook for 2-3 minutes longer.
Just until the fruits are beginning to soften. Spoon everything from your saucepan into a 1.7 litre pudding dish or something that fits the bill and even it out.
Now the crumble: Chop half of the walnuts in your food processor or blitzer until it looks like ground almonds. Add the flour, butter and sugar and continue to blitz to a coarse or fine crumble mix, whatever you prefer. I prefer to do it with my hands, well the last bit. I can feel just how the crumble should be.
Then roughly break the remaining walnuts with your hands if you are able and stir this with the crumble mixture. Scatter the crumble mix evenly over the fruits in your dish and bake them in your preheated oven for about 20-25 minutes until golden brown and your kitchen smells of warm apples.
You can serve it warm with custard or cream, but cold is just as nice.
Excellent idea for a dessert for a dinner party at the kitchen table with some home made wine, or a mug of coffee with whipped cream on top. Sprinkle with crumbled walnuts.
"Enjoy"
vrijdag 12 april 2013
Yorkshire Pink "Champagne" Rhubarb Cheesecake
From the Great British Bake Off Calender April 2013
As you can see i used strawberries instead of rhubarb as a) we don't like rhubarb and b) Rhubarb is nowhere to be found in supermarkets The Netherlands..........
Let's pretend i used Rhubarb.... Oh and this is an overnighter, and make sure you don't need the oven for anything else.
Shopping List:
For the base:
100 gr digestive biscuits, crushed
50 gr melted unsalted butter
For the filling:
900 gr cream cheese ( not low-fat)
grated zest of 1 lemon and 1 orange
1 teaspoon vanilla extract
200 gr caster sugar
4 medium free-range eggs, beaten
450 ml sour cream
For the topping:
275 gr young pink rhubarb
3 tablespoons strawberry jam or conserve
A 22-23 cm springform/clip tin, greased or spray not lined and a baking tray.
Preheat your oven to 150C. To make the base, mix the biscuit crumbs with the melted butter, tip it in your prepared tin, then press down with the back of a spoon to make an even layer. Chill while making the filling.
Put the cream cheese, grated lemon and orange zests, vanilla and sugar into a mixing bowl, or the bowl of a food mixer. Beat at a low to medium speed with an electric whisk or the mixer until very smooth, scraping down the sides of the bowl now and then. Gradually beat in the eggs, followed by the sour cream. When thoroughly combined, pour the filling into the the tin, set on the baking tray.
Carefully transfer to the oven ( the tin will be almost full) and bake for 1 hour and 45 minutes, or until just firm. The mixture will puff up, then sink on cooling ( it nearly always cracks too, but the topping disguises this). Turn off the oven but don't open the oven door, and leave the cheesecaje to cool slowly for 1 and a 1/2 hours. Remove from the oven and, when completely cold, cover and chill overnight.
The topping can be baked alongside the cheesecake. Rinse the rhubarb, trim off the ends and cut on the diagonal into 2 to 3 cm lenghts. Spread the jam over the base of a large ovenproof baking dish and arrange the rhubarb on top.
Cover tightly with foil and bake for 20-30 minutes until tender. Remove from the oven and leave to cool completely. When ready to finish the cheesecake, remove the rhubarb from its liquid, draining well. Spoon the rhubarb cooking juices into a small pan and simmer over a low heat for a few minutes until syrupy. Unclip the tin and set the cheescake on a serving plate. Arrange the fruit on top, and brush generously with hot syrup.
Chill until ready to serve.
"Enjoy"
woensdag 10 april 2013
Frog Cakes from South Australia
I have made easier cakes. What a kerfuffle!!!
They are very very sweet !!!
Shopping List:
For the Genoise sponge:
150 gr Cake flour
125 gr cornstarch
10 eggs, free range
340 gr white sugar, fine
150 gr butter, melted but cooled
2 teaspoons vanilla extract
To put it together:
4 tablespoons of raspberry glaze or jam
4.5 cups vanilla butter cream
or make the butter cream yourself:
75 gr butter, softened
2 tablespoons milk
1 teaspoon vanilla extract
225 gr sifted icing sugar
green fondant
Or to assemble another way:
1 1/4 cup raspberry glaze
2 cups vanilla icing
green or pink food colouring
4.5 cups vanilla buttercream
2 tablespoons black icing or small round candies
Preheat your oven to 180C. Grease or spray and line the bottom of an 18 cm square cake tin.
For the sponge:
Put the dry ingredients in a bowl and mix.
Mix the eggs with the melted butter, the vanilla extract and gently mix it with the dry ingredients until well blended. To avoid egg shell in the mixture, break them up in a seperate bowl and pick out egg shell with an egg shell if need be.
Pour this mixture into your prepared tin, scrape the bowl with your silicon spatula and level it all in the tin. Don't forget to put a oventray underneath as it leaks a little.
Bake in your preheated oven for about 35-45 minutes until your skewer comes out clean.
Leave to cool in the tin for 5 minutes then turn out, gently removing the baking paper from the bottom and leave to cool completely on your wire rack.
You can use two wire racks to turn the cake upside down to take the paper off.
Make sure the cake is cooled down enough for it to be able to slice it in half horizontally with a breadknife and spread the raspberry glaze on the two sides before sandwiching it back together.
Cut the cake into 5 cm squares.
Use an ice cream scooper to put a ball of buttercream on top. Lay green fondant over it and use chocolate icing or sweeties as eyes.
To assemble the other way:
Divide the vanilla icing in half. Add green foor colouring to one batc and if you are also using pink, use that for the other. The icing should be of a consistency that you can pour it and you can use warm water to thin it if need be. Set the cakes on wire racks and put either paper towel or a tray with paper towel in it, undrneathe your wire racks. Use a small ice cream scooper to put a dome shaped dollo of buttercream on each little cake. Pour the icing over the cakes to coat them completely. Set aside. Pour a second coating on after 30 minutes. Set aside to dry completely. Warm up a knife in boiling water, dry it and use it to slice through the icing to shape a frogs mouth. Make sure to reveal a little of the butter cream. You can also use writing icing to make the eyes. ( the ones that come in little tubes) Ofcourse you can use any colour to make your frogs.
"Enjoy"
Mantecadas from Spain
We prefer proper Scones with butter, but if you like lard....
Shopping List for about 25 Mantecadas:
375 gr plain flour
200 gr lard
4 tablespoons sugar
2 teaspoons baking powder
the juice of 1/2 a lemon
2 tablespoons sambuca or 1 teaspoon anise extract
2 eggs, free range
a bowl of sugar to dip them in straight out of the oven
Put the flour and baking powder in a bowl and mix. Make a little hole in the center of the flour mix. Whisk the eggs in a seperate bowl for 1 minute until light and add the lard (room temperature) sugar, lemon juice, the eggs and the sambuca in the flour mix.
Mix it well with your hands and form a ball. Then cover it with clingfilm and leave it to rest in the fridge for about 20 minutes.
In the meantime preheat your oven to 150C. Roll out the dough on your worksurface covered with a little flour and extra to put some on your rolling pin. Cut out the cookie shape with a 5-6cm fluted cookie cutter.
Lay them on your oventray lined with baking paper and bake them in your preheated oven for about 30-35 minutes until slightly brown. Whilst warm put them in a bowl of sugar.
let them cool completely on your wire rack.
I have to say it is a required taste and maybe you need to wash them down with sambuca.....Oh well.
"Enjoy"
dinsdag 9 april 2013
Sansa's Lemon Cakes ( Magdalenas)
Sansa's Lemon Cakes (Magdalenas) (Spanish Sweet Cakes)
Game of Thrones' Sansa likes her lemon cakes very much. Here is the recipe:
Shopping List:
4 eggs, free range
220 gr granulated sugar
160 gr butter, melted
200 gr plain flour
1 tablespoon baking powder
zest of 1 fresh, clean lemon
1 tablespoon milk
Preheat your oven to 180C. Put cupcake cases in your muffin tins, about 18.
Take 1/4 of the 220 gr sugar and set aside.
Beat the eggs with the rest of the sugar in a medium bowl until light and airy.
Slowly pour in the melted butter and mix thoroughly. Stir the lemon zest and the milk into the mixture.
Put the flour in a seperate bowl adding the baking powder and stir well.
Add the flour mixture to the egg mixture and again mix well.
Divide the batter between the paper cases, filling each cupcase half full. With a teaspoon you can divide the reserved sugar on top of the batter.
Bake your lemon magdalenas in your preheated oven for 15 to 20 minutes until golden brown and your skewer comes out clean. Leave to cool in the tins for 5 minutes, then turn out and leave them to cool completely on your wire rack.
"Enjoy"
maandag 8 april 2013
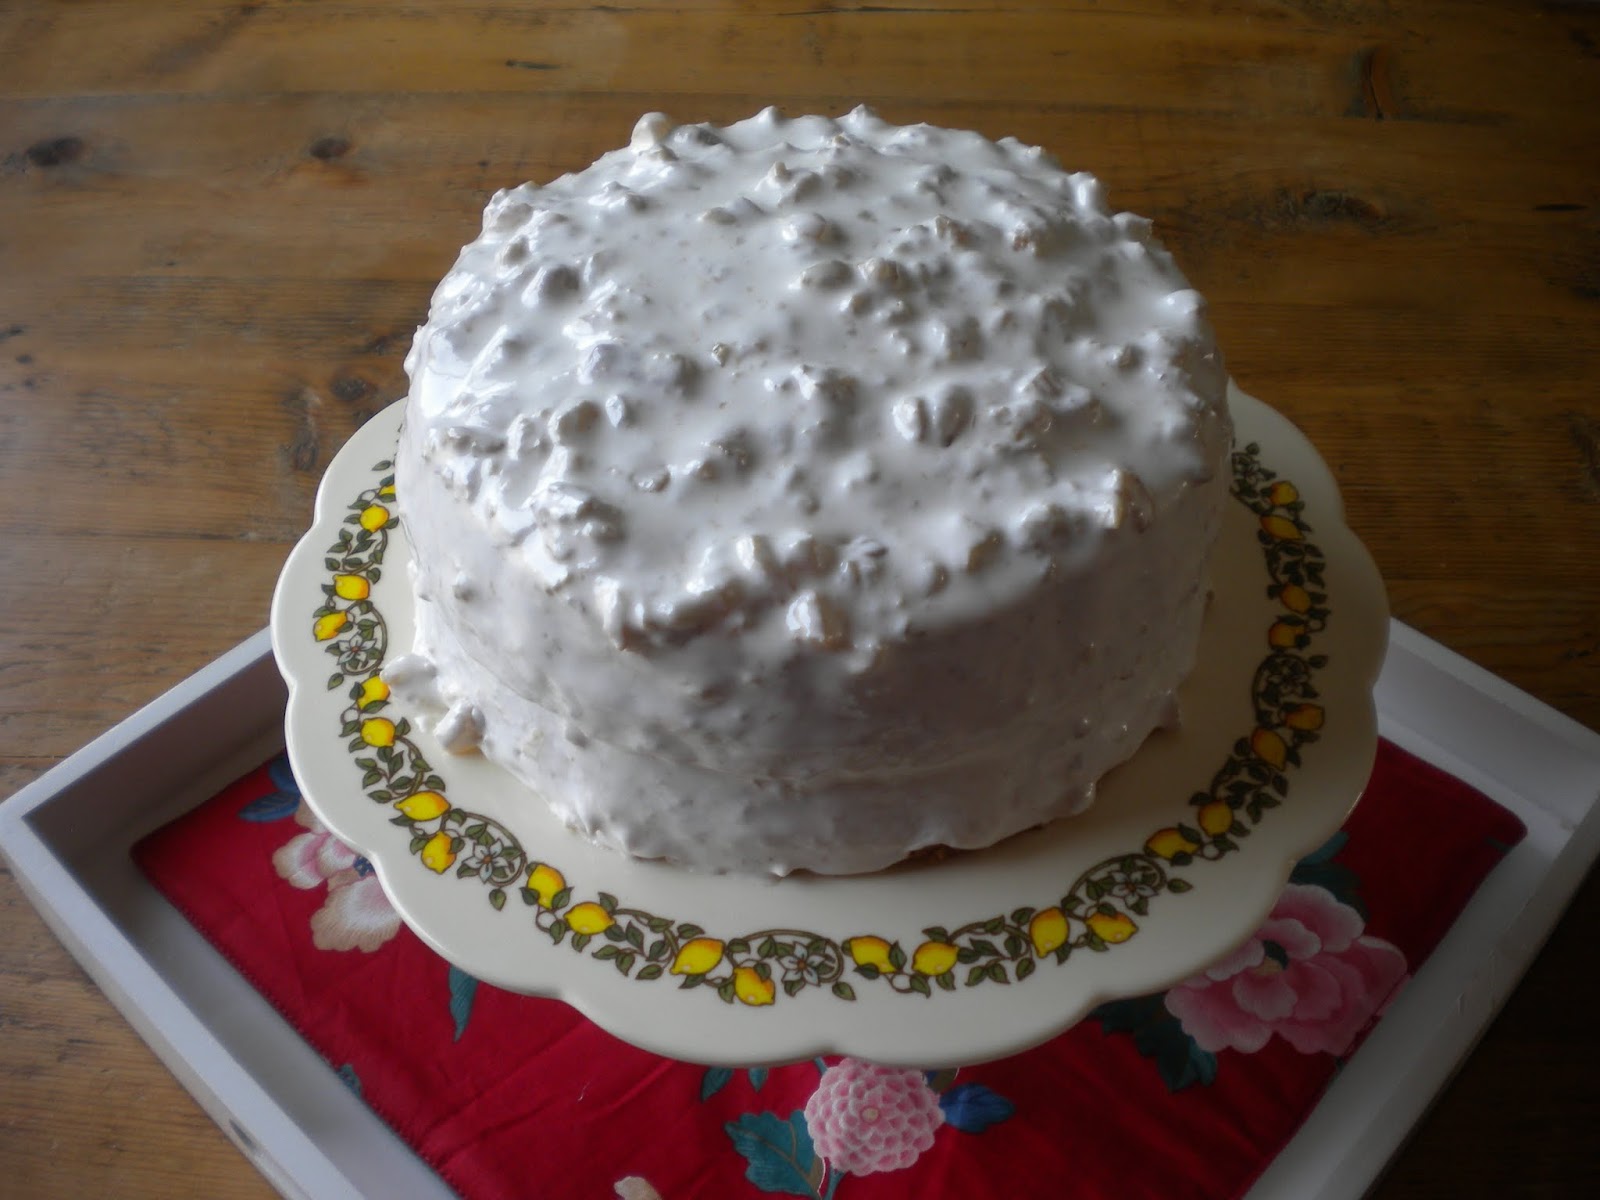
Lady Baltimore Cake from South Carolina
Lady Baltimore Cake
This is s recipe by Mrs. Mayberry from Charleston, South Carolina
Shopping List:
A Candy thermometer
For the cake:
110 gr butter, softened
300 gr soft white sugar
2 large eggs, free range, seperated
220 gr cake flour
1 teaspoon baking powder
1/2 teaspoon salt
230 ml milk
For filling nr. 1:
100 gr sugar
54 gr ground walnuts
60 ml water
1 teaspoon vanilla extract
1 teaspoon almond extract
For filling nr. 2 and for putting the cake together:
400 gr sugar
125 ml water
2 large egg whites, beaten until it peaks
1 teaspoon vanilla extract
1 teaspoon almond extract
150 gr raisins, chopped
100 gr walnuts, chopped
Juice of 1/2 lemon
Preheat your oven to 190C. Spray or grease and line two 20 cm round tins or springfroms.
Cream the butter and the sugar together until light and fluffy. Seperately: Beat the egg yolks until light, then beat them into the butter mixture. Gently fold the dry ingredients into the butter mixture alternately with the milk, ending with the flour mixture. In a clean bowl: beat the egg whites until stiff but not dry. Gently fold the whites into the batter.
Divide the batter into your prepared tins and bake them into your preheated oven for about 25 minutes. Use your caketester to see if it comes out clean. Take them out of the oven and let them cool in the tin for about 10 minutes. Turn them out onto your wire rack to cool completely.
While the cakes are baking and cooling you can make the fillings.
For filling nr: 1 : Put the sugar, walnuts and water in a small saucepan and cook over a medium heat without stirring to: very soft ball stage on your candy thermometer. Remove from the heat and let cool just a little. Stir in the extracts and beat until slightly thickened.
Spread Filling nr. 1 over the 2 cake layers.
For filling nr. 2 : Dissolve the sugar in the water in the heavy saucepan. Don't stir at this point. Bring to a boil over a medium heat. Cover and boil for 3 minutes. Then you remover the lid and boil until the mixture HOT! reaches the firm ball stage on your sugar thermometer.
Now slowly! pour this hot syrup into your beaten egg whites whilst beating all the time and continue doing so until it has cooled down a little. If you pour it in too fast you will end up with cooked eggs nasties!
Then you quickly add the extracts, raisins, nuts, and the lemon juice.
Spread a little of the filling 2 over the filling nr. 1 on each of your cake layers, then you put one layer on top of the other. Pour all of the filling nr 2 over the assembled cake and cover the sides nicely with you palette knife. You can decorate with figs if you want to, but i did not want to wander from the original recipe as it is.
"Enjoy"
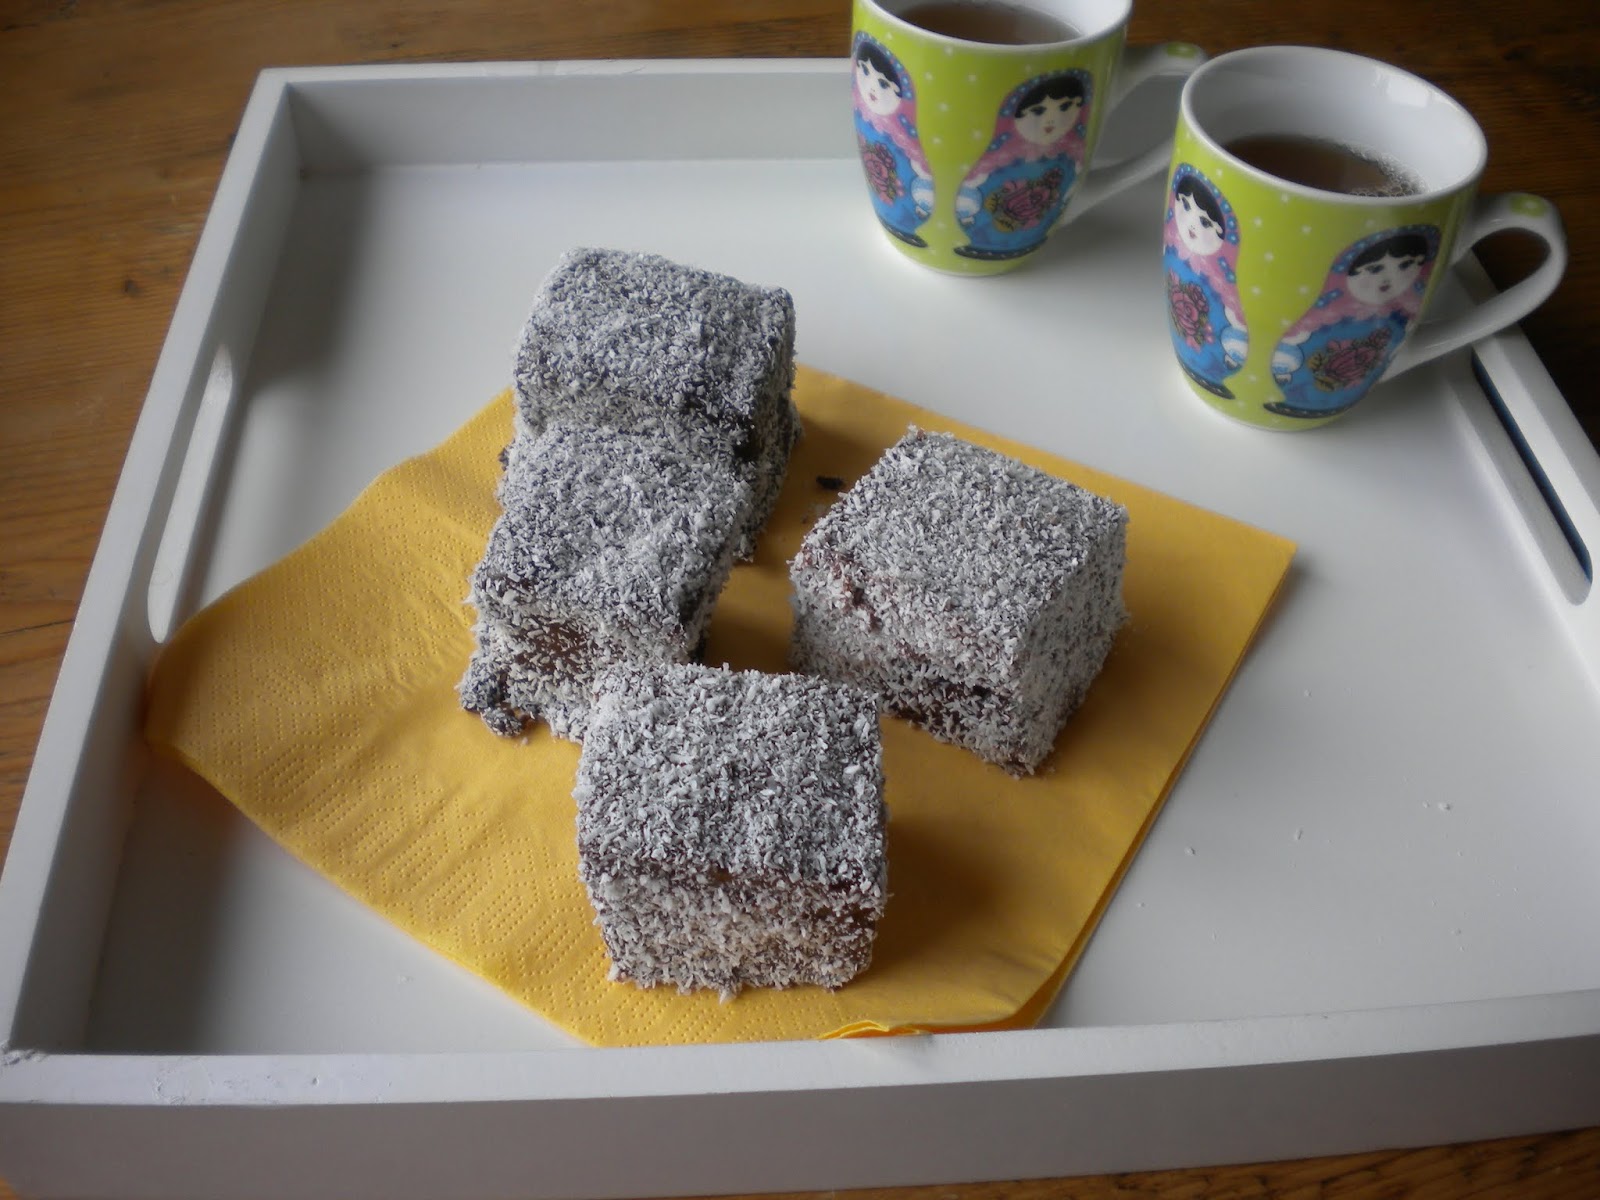
Lamingtons from Australia
Delicious Chocolate-Coconut Lamingtons It's an overnighter!
Shopping List:
For the cake:
125 gr butter, softened
150 gr soft white sugar
1 teaspoon vanilla extract
2 eggs, free range
250 gr plain flour
4 teaspoons baking powder
1/8 teaspoon salt ( half of 1/4 teaspoon)
120 ml milk
Coating:
450 gr icing sugar
5 tablespoons cocoa powder
1 tablespoon butter (14-15 gr.) melted
120 ml milk
200 gr dessicated coconut
Preheat your oven to 190C. Grease or spray a square tin (20x30cm) but do not line.
Powder it with flour if you want.
Sieve the flour, bakingpowder and salt over a bowl, mix and set aside.
Mix the butter, sugar and vanilla until light and fluffy. Add the eggs one at a time and stir all the time.
Add the flour mixture and the milk first the one and then the other and again and mix.
Pour the mixture into your prepared tin and bake for 30-40 minutes in your preheated oven until golden and the caketester comes out clean. Leave the cake to cool in the tin, then turn out upside down on your wire rack and leave it to cool completely. Leave the cake for a night so as it can firm up before you put on the coating.
The next day:
For the coating you mix the icing sugar and the cocoa in a big bowl. Heat the milk and add the butter. Let the butter melt into the milk, mix well and pour the milk into the sugar mixture.
Mix very well until the coating is liquid but firm.
Cut the cake in squares, 24 or less. Put the dessicated coconut in a shallow plate or tray.
Prick a fork into a little cake, dip it in the chocolate coating and then roll it through the coconut.
Put the little cake on a wire rack for it to dry. Repeat this procedure until all the cakes are done. Pour some warm milk into the chocolate coating if it dries out or gets to sticky.
Tip: The coating will drip on your work surface, so maybe it's an idea to put some papertowel or baking paper underneath your wire rack to catch the drips.
"Enjoy"
zondag 7 april 2013
Kladdkaka from Sweden
Kladdkaka
A delicious big brownie chocolate cake from Sweden !
Shopping List:
200 gr butter, softened
200 gr dark chocolate, preferably with 70% cocoa solids
4 eggs, free range
200 gr fine white sugar
250 gr self-raising flour
Preheat your oven to 200C. Spray or grease but not line your 23-24 cm round springform tin.
Melt the butter in a pan on a low heat. Crack the chocolate into little pieces and add them to the melting butter whilst stirring.
Beat the eggs and the sugar until light and fluffy. Mix the chocolate-butter mixture into it and gently fold the flour through it. Pour into your prepared tin.
Bake the cake in your preheated oven for about 25 minutes. The cake should be a little soft in the middle when you take it out of your oven.
Leave it in the tin for about 5 minutes before turning it out and moving it onto a serving plate.
Serve it with fresh - frozen red fruits, cream and a nice hot cup of coffee.
"Enjoy"
Abonneren op:
Posts (Atom)
Cactus Gratis patroontje van Spin a Yarn Crochet (Camilla Cactus) Ik heb een haaknaald gebruikt van Clover 3,5 mm Voor Acryl heb ik Stylecra...
-
Vandaag leen ik mijn kookblog even uit aan mijn facebookpage simple ideas big impact. We gaan een patroontje uitleggen. ; Hondsroos! Nodi...
-
Lancashire Courting Cake To show off their baking skills to their fiancé/betrothed (or maybe their future mother in law) girls from ...